Compare progress photos side by side to see how much you have progressed!
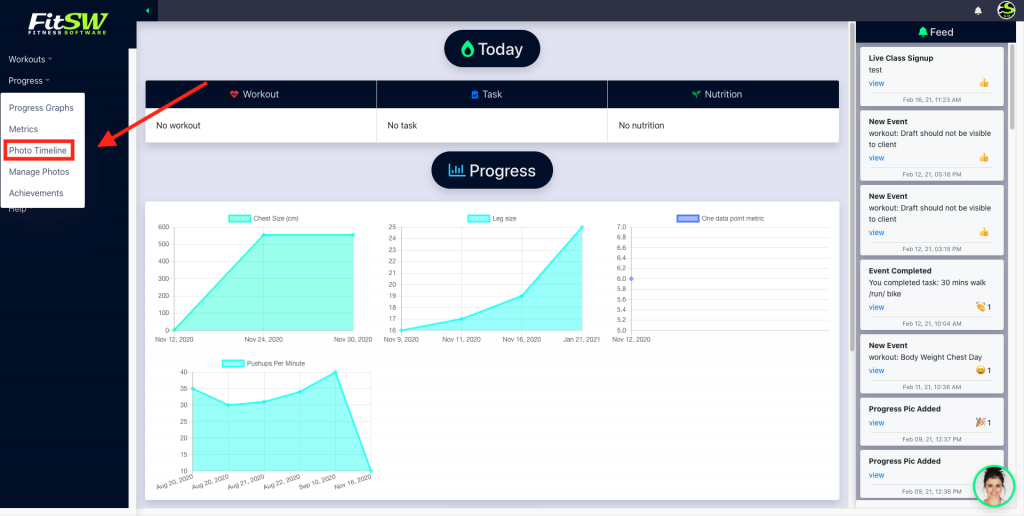
To create comparison photos of progress pictures (to see how to upload progress pictures, visit our help center article on uploading progress pictures), you must first click on the Progress tab at the top of your screen. Then a pull-down menu will appear with a list of 3 options. Choose Photo Timeline to continue. (See image below.)
Once you are on the Photo Timeline page, you can view all of your previous uploaded pictures. Each photo contains an X (delete the photo) in the top left and a Compare option (create a comparison photo). (See image below.)
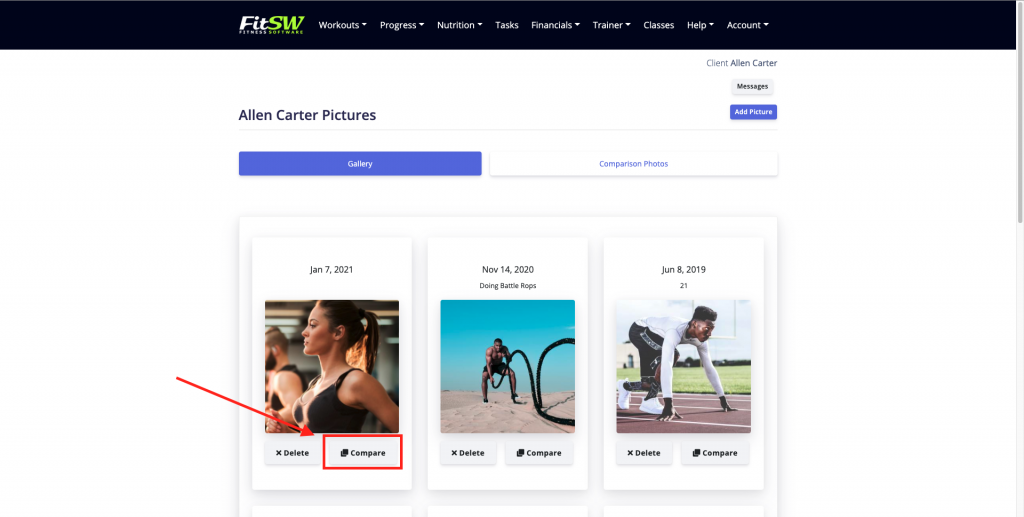
To create a comparison, click Compare on the picture you would like to compare and then select an additional photo to compare to. Once you have selected 2 photos, our system will automatically generate a comparison photo for you and redirect you to the Comparison Photos page. Comparison photos of progress pictures is a great way for the personal trainer to show the client how far they have come since they have started training together!